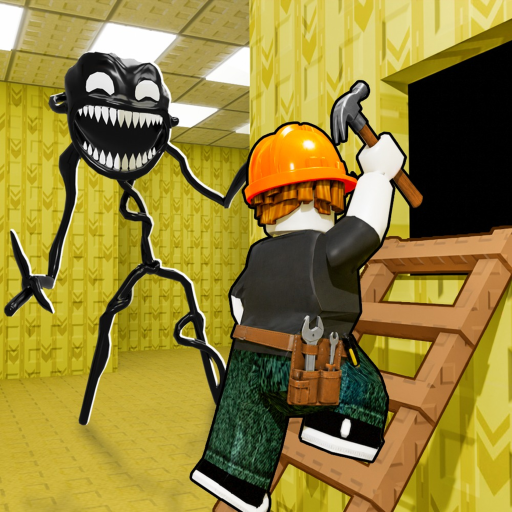
Build Your Backrooms How to Place Monsters: Step-by-Step Guide
Build Your Backrooms how to place monsters covers ownership, toolbar selection, connected rooms, capacity checks, visitor flow, and catches. Use live checks.
This Build Your Backrooms How To Place Monsters page starts from the evidence available for the current game and keeps changing values in the live interface. Confirm update-sensitive details on the official Roblox experience.
To place a monster, collect or buy an available one, select it from the toolbar, and put it inside a connected maze room with an open slot. Then return to normal play view and verify that visitors can reach the route and the monster begins hunting.
Collect a Monster You Can Actually Use
Community tutorials show an early flow where a player buys a first monster, collects it from the toolbar, and prepares it for placement. Wanderer appears in those demonstrations, but neither its current price nor permanent starter status is officially established. Begin with an option visible and available in your own interface.
Choose a Connected Room
Select the monster from the toolbar and target a room attached to the active maze. Current in-game tutorial text shown in community footage says a monster needs a connected room. If the outline or placement feedback rejects the location, move to a clearly connected floor area before changing anything else.
- Confirm the room joins the active maze.
- Leave clear floor space around the placement.
- Watch the live outline or error message.
- Do not assume a decorative platform counts as a room.
| Check | Required evidence | Next move |
|---|---|---|
| Ownership | Monster appears in toolbar | Select it |
| Connection | Room belongs to active maze | Choose valid floor |
| Capacity | Slot is available | Expand connected rooms if full |
| Hunt | Visitors enter and monster activates | Simplify route if needed |
Check Capacity Before Buying More
The same tutorial context says more connected rooms increase the monster-slot limit. This is a relationship, not a verified slots-per-room formula. Read the current capacity indicator, then decide whether the next purchase should be a room or a monster. Buying first and discovering a full limit is an avoidable progression mistake.
Test the Hunt From Normal Play
After placement, return to the base or normal play view so the monster can begin hunting in the demonstrated flow. Watch for people entering the maze and for a catch result. The official description confirms that monsters catch people and contribute to cash, including while you are offline, but it does not publish pathfinding details or a fixed catch reward.
For this topic, the safest habit is to compare the live result with the expected step before making another purchase. A placement and troubleshooting sequence centered on connected rooms and current monster capacity works only when each connection and placement is accepted by the current server. If the interface disagrees with an older tutorial, follow the interface and keep the unverified value out of your notes.
A useful field check is to change one variable and repeat the same short observation. That keeps a placement and troubleshooting sequence centered on connected rooms and current monster capacity tied to something visible instead of a theory about hidden rates. Record the room connection, current capacity, displayed cost, and result separately so a later update is easy to spot.
Do not treat silence in the official description as permission to fill a gap. For a placement and troubleshooting sequence centered on connected rooms and current monster capacity, unknown prices, caps, stats, controls, and pathfinding details should stay unknown. You can still make progress by following placement feedback, testing a compact route, and choosing the next action from the bottleneck shown live.
The practical advantage of this method is reversibility. When a placement and troubleshooting sequence centered on connected rooms and current monster capacity is tested in small steps, a failed connection or weak layout can be corrected without rebuilding everything. Pause after each placement, confirm the maze still functions, and spend only when the next purchase has a clear job.
Use community videos as interface demonstrations rather than patch notes. They can show where a tool appeared or how a tutorial flowed at recording time, while the official Roblox page and current game remain the authority. That distinction is especially important for a placement and troubleshooting sequence centered on connected rooms and current monster capacity, because balance and menus may change independently.
Once the immediate check passes, walk the maze when the game allows it. Seeing the route from inside can reveal unclear openings and unused space that are difficult to notice from the build grid. Bring that observation back to a placement and troubleshooting sequence centered on connected rooms and current monster capacity and revise one section instead of guessing at a global redesign.
For this topic, the safest habit is to compare the live result with the expected step before making another purchase. A placement and troubleshooting sequence centered on connected rooms and current monster capacity works only when each connection and placement is accepted by the current server. If the interface disagrees with an older tutorial, follow the interface and keep the unverified value out of your notes.
A useful field check is to change one variable and repeat the same short observation. That keeps a placement and troubleshooting sequence centered on connected rooms and current monster capacity tied to something visible instead of a theory about hidden rates. Record the room connection, current capacity, displayed cost, and result separately so a later update is easy to spot.
Do not treat silence in the official description as permission to fill a gap. For a placement and troubleshooting sequence centered on connected rooms and current monster capacity, unknown prices, caps, stats, controls, and pathfinding details should stay unknown. You can still make progress by following placement feedback, testing a compact route, and choosing the next action from the bottleneck shown live.
The practical advantage of this method is reversibility. When a placement and troubleshooting sequence centered on connected rooms and current monster capacity is tested in small steps, a failed connection or weak layout can be corrected without rebuilding everything. Pause after each placement, confirm the maze still functions, and spend only when the next purchase has a clear job.
Use community videos as interface demonstrations rather than patch notes. They can show where a tool appeared or how a tutorial flowed at recording time, while the official Roblox page and current game remain the authority. That distinction is especially important for a placement and troubleshooting sequence centered on connected rooms and current monster capacity, because balance and menus may change independently.
Once the immediate check passes, walk the maze when the game allows it. Seeing the route from inside can reveal unclear openings and unused space that are difficult to notice from the build grid. Bring that observation back to a placement and troubleshooting sequence centered on connected rooms and current monster capacity and revise one section instead of guessing at a global redesign.
For this topic, the safest habit is to compare the live result with the expected step before making another purchase. A placement and troubleshooting sequence centered on connected rooms and current monster capacity works only when each connection and placement is accepted by the current server. If the interface disagrees with an older tutorial, follow the interface and keep the unverified value out of your notes.
A useful field check is to change one variable and repeat the same short observation. That keeps a placement and troubleshooting sequence centered on connected rooms and current monster capacity tied to something visible instead of a theory about hidden rates. Record the room connection, current capacity, displayed cost, and result separately so a later update is easy to spot.
Frequently Asked Questions
How do I place monsters in Build Your Backrooms?
Select an owned monster from the toolbar and place it on valid floor inside a connected maze room while a slot is available.
Why does monster placement fail?
Check the room connection, open floor, and current monster-slot limit first. Follow any live error text before trying unrelated changes.
How do I get more monster slots?
Current tutorial evidence says building more connected rooms increases the limit, though no fixed formula is verified.
Do placed monsters work offline?
The official description says monsters can catch people while you are offline. It does not state the rate or cap.